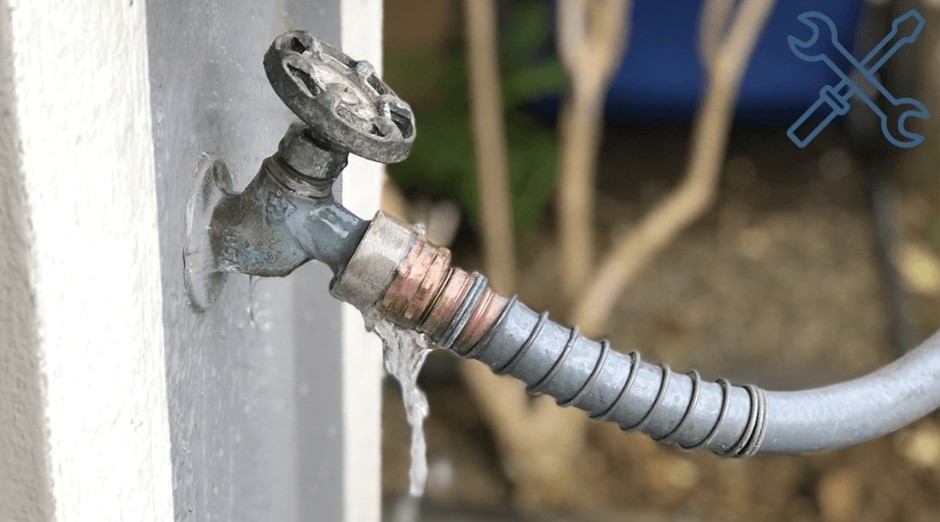
Having an outside faucet, also known as a hose bib or spigot, is a convenient feature for any homeowner. It allows you to water your plants, wash your car, or carry out various outdoor tasks with ease.
However, it can be frustrating to discover that your outside faucet is leaking when you attach a hose to it. Not only can this waste water and increase your utility bills, but it can also cause damage to the faucet and surrounding areas.
In this article, we will explore the common causes of a leaking outside faucet when a hose is attached. We’ll also provide step-by-step troubleshooting and repair tips to help you resolve the issue.
Common Causes of Leaking Outside Faucets

Let’s explore some of the typical reasons why your outside faucet might leak when a hose is attached:
- Worn-out Washer: One of the most common culprits behind a leaking outside faucet is a worn-out or damaged rubber washer.
This small yet crucial component resides inside the faucet and is responsible for creating a watertight seal when you turn on the faucet.
As time goes by and with constant use, this washer can wear down, develop cracks, or lose its elasticity, ultimately leading to water seepage around the faucet handle.
- Loose or Damaged Connection: Another likely cause of leaks is a loose or damaged connection between the hose and the faucet. Over time, the frequent attachment and detachment of the hose can cause the connection to loosen.
Additionally, wear and tear can lead to damaged threads on either the hose or the faucet, further contributing to water leakage when the faucet is turned on.
- Cracked or Split Pipe: If you live in an area with freezing temperatures during winter, your outside faucet is at risk of developing cracks or splits in the pipe.
Water left inside the faucet can freeze and expand, exerting pressure on the pipe walls. When the faucet is used again after thawing, water can seep through these tiny openings, causing leaks during warmer seasons.
- High Water Pressure: While strong water pressure is essential for efficient water flow, excessively high water pressure can be detrimental to your outside faucet’s integrity.
The intense pressure can strain the faucet and its components, particularly the seals. Over time, this stress weakens the seals and may lead to water escaping from the faucet when in use.
Tools and Materials You’ll Need

Before you start troubleshooting and repairing the leaking outside faucet, gather the following tools and materials:
- Adjustable Wrench: This tool will help you loosen or tighten nuts and bolts.
- Screwdriver: Depending on your faucet type, you’ll need the appropriate screwdriver to remove screws and access internal components.
- Replacement Rubber Washer: A new rubber washer is crucial to create a watertight seal and prevent leaks when the faucet is in use.
- Pipe Sealant or Plumber’s Tape: Use pipe sealant or plumber’s tape to ensure a secure and leak-free connection when reassembling components.
- Pipe Repair Kit (if the pipe is cracked): If you discover cracks or splits in the faucet pipe, a pipe repair kit will aid in effectively fixing the damage.
- Pressure Regulator (if high water pressure is the issue): Installing a pressure regulator will help regulate water pressure and protect your faucet from unnecessary strain.
- Insulating Materials: For regions with colder climates, insulating materials such as foam insulation or faucet covers will safeguard the outside faucet and exposed pipes from freezing damage.
How to Fix Outside Faucet Leaking When Hose is Attached

Step 1: Turn Off the Water Supply
Before you begin any repair work, ensure to turn off the water supply to the outside faucet. Locate the water shutoff valve inside your house, typically near the faucet, and turn it off to prevent water flow.
Step 2: Disconnect the Hose
Unscrew the hose from the faucet and set it aside. This will allow you to access the faucet easily and inspect it thoroughly.
Step 3: Inspect the Washer
Take a look inside the faucet to inspect the rubber washer. If you notice any cracks, tears, or signs of wear, it’s likely the culprit behind the leaks.
Step 4: Replace the Washer
Remove the old washer and replace it with a new one of the same size and shape. Ensure it fits snugly to create a proper seal when the faucet is in use.
Step 5: Check the Faucet Connection
Inspect the faucet and hose connections for any damage or signs of wear. If the threads are worn or damaged, consider replacing the hose or using a thread repair kit.
Step 6: Tighten or Replace the Connection
If the connection is loose, use an adjustable wrench to tighten it. If it is damaged, replace the hose or the faucet, depending on where the issue lies.
Step 7: Inspect the Faucet Pipe
Check the faucet pipe for cracks or splits, especially if you experienced freezing temperatures. If you find any damage, proceed to repair or replace the pipe.
Step 8: Repair the Cracked Pipe
If you notice cracks in the pipe, use a pipe repair kit to fix the damage. Follow the kit’s instructions carefully to ensure proper repair.
Step 9: Regulate Water Pressure
If high water pressure is causing the leaks, consider installing a pressure regulator. This device will help reduce water pressure and protect your faucet from unnecessary strain.
Step 10: Protect from Freezing Temperatures
To prevent freezing damage during winter, insulate your outside faucet and exposed pipes. Use foam insulation or faucet covers to keep the water supply safe from freezing temperatures.
Preventive Measures for Future Leaks
To avoid future leaking issues with your outside faucet, consider the following preventive measures:
Regular Maintenance

Regular maintenance is key to ensuring the longevity and efficiency of your outside faucet. Here’s a detailed look at the key components of regular maintenance:
- Schedule Periodic Inspections: Set a schedule for periodic inspections, ideally before the start of each watering season.
Look closely for any visible damage, rust, or corrosion on the faucet’s surface, as these may indicate underlying problems that need attention.
- Check for Wear and Tear: During the inspections, pay special attention to crucial components like washers, seals, and threads. Over time, these parts can degrade due to constant exposure to water and the elements.
Be sure to inspect the rubber washer inside the faucet for any cracks, tears, or loss of elasticity.
- Promptly Replace Worn-out Parts: If you discover any worn-out washers or damaged components during the inspection, don’t delay in replacing them.
Prompt action can prevent minor issues from escalating into major leaks and more extensive repairs. Keep spare parts, such as rubber washers, on hand so you can quickly address any problems you encounter.
- Check and Tighten Connections: Examine the connection between the hose and the faucet for any signs of looseness or damage. If you notice any issues, use an adjustable wrench to tighten the connection securely.
Ensuring a snug fit between the hose and the faucet will reduce the risk of leaks due to loose connections.
- Inspect the Faucet Surroundings: Beyond examining the faucet itself, inspect the area around the outside faucet for any signs of water damage or moisture.
Check nearby walls, the foundation, and other surfaces for damp spots, discoloration, or mold growth.
Early detection of leaks or water seepage will allow you to address the underlying issue promptly and prevent potential damage to your home’s structure.
- Consider Professional Inspection: While regular DIY maintenance is crucial, consider scheduling periodic professional inspections of your outside faucet and plumbing system.
A licensed plumber can provide a more comprehensive assessment and identify any potential issues that may not be immediately apparent.
Their expertise can help you address any hidden problems and ensure your outdoor water supply remains in top-notch condition.
Winterization

Winter can be particularly harsh on outside faucets, with freezing temperatures posing a significant threat. Properly winterizing your faucet is essential to safeguard it from freezing-related damage and ensure its longevity.
Here’s a guide to effective winterization:
- Disconnect and Remove Hoses: As winter approaches, disconnect and remove all hoses from the outside faucet.
Leaving hoses attached can trap water inside the faucet, leading to potential freezing and subsequent damage. Drain the hoses thoroughly before storing them in a dry and sheltered area for the winter.
- Completely Drain the Faucet: Ensuring that the outside faucet is completely drained of water is crucial to prevent freezing inside it.
Even residual water can expand when frozen, causing cracks or splits in the faucet and connecting pipes.
Turn off the water supply and turn on the outdoor faucet. Let any remaining water flow out, and be sure to drain both the hot and cold sides if your faucet has separate controls.
- Insulate Exposed Faucet and Pipes: Protecting your outside faucet and exposed pipes from extreme cold is essential to prevent freezing-related damage.
Consider using insulating materials such as foam covers or wraps designed for outdoor faucets. These insulators provide an extra layer of protection against freezing temperatures.
Ensure that you cover the entire faucet, including the handle and connecting areas. Pay special attention to areas prone to freezing, such as the valve and pipe connections.
Secure the covers tightly to prevent wind from blowing them off during winter storms.
- Seal Off Crawl Spaces and Vents: If your outside faucet is located near crawl spaces or vents, consider sealing off these openings during winter.
Cold air drafts can lead to freezing, so sealing them will help maintain a more consistent temperature around the faucet.
- Install Frost-Free Faucets: If you’re in the process of replacing your outside faucet or considering an upgrade, opt for a frost-free faucet.
These faucets are designed with a longer stem that extends inside your home, where it’s less exposed to freezing temperatures. Frost-free faucets help minimize the risk of freezing-related damage during winter.
Using High-Quality Connectors

When it comes to selecting hoses and connectors for your outdoor faucet, the choice of materials plays a critical role in determining their durability and overall performance.
High-quality connectors, crafted from durable materials, offer several advantages that contribute to their longevity and effectiveness.
Let’s take a closer look at some of the durable materials commonly used in high-quality hoses and connectors:
- Brass: These materials offer strength and corrosion resistance, making them durable and less likely to crack or rust. This provides a secure attachment to reduce the risk of leaks and ensures a longer lifespan
- Reinforced Rubber: Connectors made from this material have multiple layers of rubber with strong fibers, providing high resistance to kinks, abrasions, and punctures.
This design ensures they remain leak-free and functional even with regular use.
- Stainless Steel: This material provides extra strength and corrosion resistance, making it suitable for environments with high humidity or harsh conditions.
When to Seek Professional Help

While some minor leaks and simple repairs can be handled as DIY projects, certain situations may require the expertise of a skilled professional. Here are some scenarios in which you should consider reaching out to a professional plumber:
- Persistent Leaks: If you’ve attempted to fix the leaking outside faucet, but the problem persists or worsens, it indicates a more challenging issue that requires professional attention.
A plumber can thoroughly inspect the faucet, identify the root cause of the leak, and implement the appropriate solution.
- Hidden Leaks: Leaks can sometimes occur in concealed areas, such as within the faucet assembly or underground pipes.
Detecting and repairing these hidden leaks demands specialized tools and knowledge that professional plumbers possess.
- Frozen or Burst Pipes: In colder climates, freezing temperatures can cause outside faucet pipes to freeze or even burst.
Dealing with frozen or burst pipes requires professional expertise to prevent further damage and ensure the proper repair of affected components.
- Water Pressure Problems: If your outside faucet consistently experiences low or inconsistent water pressure, a plumber can assess your overall plumbing system.
By doing so, they can identify the underlying issue and restore adequate water flow.
- Corroded or Rusted Components: Corrosion and rust within the faucet or connecting pipes can impede proper water flow and cause leaks. Professional plumbers have the tools and techniques to address these issues effectively.
- Old or Worn-Out Faucets: If your outside faucet is old or severely worn out, attempting repairs may only offer temporary solutions.
A professional plumber can assess the condition of the faucet and recommend suitable replacements for long-term reliability.
- Complex Faucet Installations: Installing new faucets or upgrading your outdoor watering system may require professional assistance. This ensures proper connections, prevents leaks, and optimizes functionality.
- Ensuring Compliance: If your area has specific building codes or regulations concerning outdoor plumbing, a professional plumber will ensure that any repairs or installations meet these requirements.